Key Takeaways
1. The best steps to prepare your garage door for winter include sealing perimeter gaps, lubricating, insulating, replacing worn weatherstripping, and installing a garage heater.
2. Winterization of the garage door matters because cold weather contracts metal and thickens lubricants, making the door not function properly.
3. Certified technicians from Anchor Doors & Service handle 26-point winter checks and targeted repairs, so your residential door seals properly all winter.
5 Easy Steps to Winterize Your Garage Door This Winter
To winterize your garage effectively, start with simple winter maintenance steps. These include sealing gaps, lubricating hinges, and testing the balance. They keep the garage door moving safely, help reduce heating costs, and support better energy efficiency in the rooms next to the garage.
Step 1: Seal Up Cracks and Gaps
When cold temperatures arrive, even tiny gaps become warm air escape points and let cold air and moisture creep inside. That extra heat loss encourages condensation on metal parts, stresses the opener, and can make the garage floor damp and icy.
Sealing leaks protects hardware from rust, reduces heat transfer, and helps the door track smoothly through the first winter season.
Do this next:
- Find leaks by doing a dusk daylight check and a smoke test to spot drafts around doors, windows, sills, and wall penetrations.
- Inspect the garage door’s bottom seal and retainer for damage and replace them with the correct profile.
- Add a garage door threshold strip if the concrete slab is uneven.
- Seal gaps using exterior-grade caulk outside and paintable acrylic inside, adding backer rod or low-expansion foam for wide gaps.
- Re-test for drafts and confirm smooth door operation while keeping appliance vents clear.
If the bottom seal or jamb weatherstrip is brittle or the slab isn’t level, Anchor Doors & Service can replace gaskets, add thresholds, and tune the door so it seals tight before the first freeze.
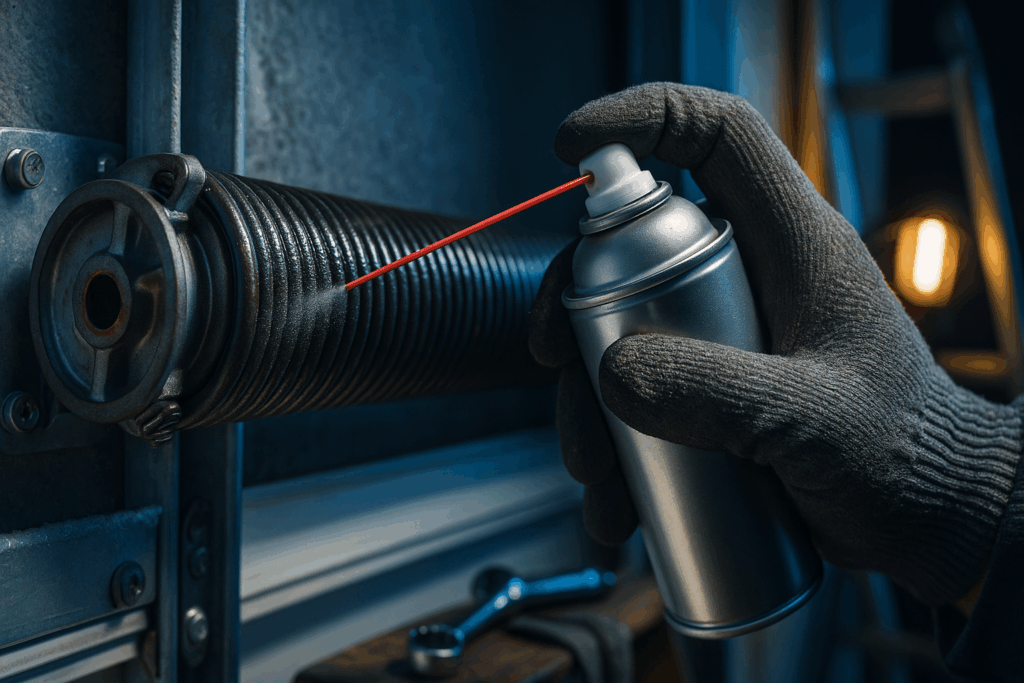
Step 2: Lubricate All Moving Parts
In freezing temperatures, grease that flowed easily in summer can thicken. Without the proper lubricant, hinges squeal, rollers bind, and springs lose travel just when the door is heavier from snow and ice.
That extra resistance makes the opener work harder, increases energy costs indirectly, and can shorten the life of the system.
Do this next:
- Use the right products. Apply a garage-rated lithium grease for metal-on-metal (hinges, roller bearings, torsion springs) and a dry silicone spray for nylon roller stems and weatherstripping.
- Hit the critical points. One drop per hinge knuckle, a light ring on roller bearings, a thin spray across torsion spring coils, and a pea-sized bead in each opener chain/belt link.
- Prep and apply correctly. Wipe old residue with a rag and mild solvent, then use sparingly; cycle the door 2–3 times to work the lubricant in.
Our technicians perform a 26-point preventative check, lubricate hinges, rollers, and springs with the right products, and set travel/force so the opener isn’t strained in cold weather.
Call Anchor Doors: Tecumseh (519) 979-9299 | Chatham (519) 352-9699
Step 3: Insulate Everything
Heat loss in winter starts with air leaks and uninsulated surfaces. A garage with bare walls, a thin door, and gaps at the perimeter becomes a cold sink that stresses your opener, invites condensation, and pushes cold air into adjacent rooms.
Guidance summarized by the International Code Council, based on Insurance Institute for Business & Home Safety research, notes that unprotected pipes begin to freeze when outdoor temperatures drop to around 20°F (–6°C), especially in unheated, uninsulated spaces.
Do this next:
- Choose simple, sensible materials. Use fiberglass insulation batts for walls and ceiling, or foam board insulation/foam board where you want clean, sturdy panels.
- Seal first, then insulate. Caulk little gaps and foam bigger holes around pipes and wires. Stopping drafts improves the performance of any insulation.
- Give the door some warmth. Add garage door insulation kits or insulation kits sized for your door panel style.
- Watch the weight. Extra foam insulation adds weight. If the door stops closing smoothly or feels unbalanced, call a professional to adjust the springs before damage occurs.
- Keep it neat and safe. Don’t cover sensors or tracks, and finish exposed insulation with a simple wall covering to prevent snagging by hands or tools.
Step 4: Add Weatherstripping to Lock in Heat and Keep Moisture Out
Small gaps around the door and frame invite cold air, water, and slush. This raises heating costs, can increase utility bills, and stresses the opener. Fresh seals are a quick, high-impact garage weatherproofing upgrade.
- Inspect the contact points. Look for light peeking through along the sides, top, and bottom.
- Refresh the bottom seal. Slide in a new U- or T-style gasket sized for your door track; it should rest evenly on the floor without bunching.
- Seal the sides and top. Install vinyl or rubber door stops (weatherstripping) so they press lightly against the closed door, forming a continuous seal.
- Do not forget thresholds and entries. Add a threshold seal if the slab is uneven, and replace worn sweeps on side doors and window strips to limit cool air infiltration.
- Test and fine-tune. Close the door on a sheet of paper; a gentle tug should meet resistance.
Step 5: Choose a Safe, Efficient Garage Heater
If you use the space for workouts or projects, add heat only after you’ve sealed drafts and insulated the door, walls, and ceiling; otherwise, you’ll pay to warm the outdoors. Then choose a simple, safe option that fits your routine:
- Portable electric heaters. Ceramic or oil-filled models are quiet, easy to move, and produce no indoor emissions.
- Wall-mounted electric or infrared heaters. Effective near a workbench or gym area; they warm people and tools quickly and support better temperature control.
- Mini-split heat pump. Best comfort and efficiency if you’re out there most days; provides heating in winter and cooling in summer.
- Sealed, vented gas unit. Only if professionally installed and vented outdoors. Install carbon monoxide detectors and comply with local permits.
- Smart use tips. Heat the zone you’re using, not the whole garage; set a timer; keep combustibles away from heaters.
Step 6: Make Winter Upkeep Routine
After storms, check that the bottom seal is not frozen to the slab and clear ice ridges at the threshold. Once a month, re-wipe sensors, spot-lubricate any squeaky hinges, and tighten obvious loose fasteners.
These small habits protect your new garage door (or older door) from winter weather and mid-season failures. If the door feels heavy, stalls, or the opener struggles even after basic care, spring tension and force settings likely need professional adjustment.
For seasonal tune-ups and proper sealing, Anchor Doors & Service can replace residential gaskets and thresholds and set opener force and balance for cold weather.
6 Ways Cold Weather Affects Garage Door Safety
Cold weather changes how your garage door behaves. As metal contracts, lubricants thicken, and rubber seals harden during the winter season, the system gains friction, loses balance, and may stop reacting to safety features the way it should.
Metal Contraction Changes How the Door Carries Its Weight
In cold weather, the steel panels, hinges, tracks, and springs all tighten slightly. The door starts to sit tighter in the opening and has less wiggle room than it did in mild weather, so it’s more likely to bind in the tracks or twist slightly.
When that happens, and someone tries to force it, a panel can catch or even jump the track.
Thickened Lubricants Raise Operating Force
The grease that feels fine in summer can turn thick and sluggish once temperatures drop. Hinges and rollers stop gliding and start dragging, which means the opener has to pull much harder to move the same door.
That extra effort hides small problems, puts more stress on springs and cables, and makes sudden failures more likely over the winter.
Hard, Brittle Seals Turn From Protection Into a Snag Point
Rubber bottom seals and weatherstripping are meant to flex and seal, but cold conditions make them stiff and more likely to crack.
When brittle edges catch on rough concrete or ice, the door may stick in the first few inches or suddenly release, which is when feet, pets, and stored items near the edge are most at risk.
Frozen Thresholds Create Unpredictable Movement
After a thaw and refreeze, a thin band of ice at the threshold can glue the bottom seal to the slab. When you press the opener, it keeps pulling until something gives: the seal tears, the motor stops and reverses, or the whole door breaks free at once.
Each time that happens, the opener “learns” the wrong kind of resistance, which can make it less reliable at spotting real obstructions later.
Safety Sensors Can Drift out of Alignment
Cold, wind, and tiny shifts in the tracks or framing can nudge photo-eyes out of alignment over the course of the season. A sensor that was fine in October may start blinking or misreading by January, so the door refuses to close when you need it to.
The bigger risk is when someone overcompensates and loosens the settings so much that the door no longer reverses as quickly on contact.
Springs Work Harder When the Door Is Stiff
Torsion and extension springs are only designed for a set number of open–close cycles. When the door is heavier from ice or moves roughly because of hardened grease, every cycle uses more of that life.
Springs that were already near the end of their rating are much more likely to snap in cold weather, which can leave the door slamming shut or too heavy to lift safely.
People Tend to Force the Door at the Worst Time
Winter issues usually show up during the morning rush, when someone is already running late. That is when people start yanking on a frozen door, tapping the opener button over and over, or trying to “help” the motor by lifting from one side.
Those habits make it easier for the door to jump the tracks, bend panels, or drop faster than anyone expects.
Winterize Your Garage Door With Anchor Doors & Service
A winterized garage door does two things that matter when temperatures drop: it protects the door system from strain and keeps your living space more comfortable. Sealing leaks, lubricating moving parts, upgrading weatherstripping, and adding sensible heat only after insulation are small tasks with outsized impact.
Do them before the first freeze, and you’ll avoid mid-winter breakdowns, higher energy bills, and stuck doors on the coldest mornings.
Here’s what you should be doing next:
- Walk the perimeter this week and fix the basics like replacing brittle bottom seals, tuning side/top weatherstripping, and lubricating hinges, rollers, and springs.
- Improve the envelope by adding a door insulation kit, sealing wall penetrations, and rechecking photo-eye alignment and auto-reverse after any adjustments.
- Book a professional tune-up with Anchor Doors & Service for a 26-point winter check, gasket/threshold replacements, and opener force/safety testing.
Ready for a tighter seal, fewer drafts, and smoother operation in cold temperatures? Request a service visit or call the numbers above to schedule your winterize garage door appointment with Anchor Doors & Service.
FAQs
Garages lose the most heat through the garage door, especially if it is thin or uninsulated, which can leak more warmth than a typical wall. Depending on your door style, you can often add insulation as a DIY upgrade to cut that heat loss.
Leaving a garage door slightly open can let some trapped hot air escape, but it is not a substitute for proper insulation and maintenance. You may get a bit of relief, yet a well-sealed, insulated garage and door system does far more to control extreme heat than air circulation alone.
The cheapest way to keep a garage warm is usually a simple electric heater. A compact portable unit or a wall- or ceiling-mounted model works well in tight spaces and adds heat without taking up valuable floor area.